Connect MySQL with NetBeans
A very common problem which recurrs through software development is on how to connect to MySQL Database server using NetBeans IDE. In this post, I intend to present a very clear description on how to do so.
I have used NetBeans 6.1 with MySQL DB Server. But connecting with other versions of the IDE would be similar.
1. Open your IDE and click on the "Services" Tab as shown. If it is not shown, click on Windows->Services to display it.
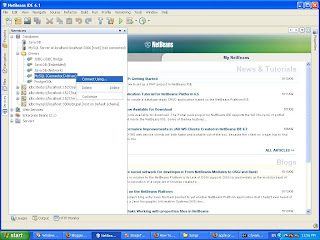
You can see the Driver for MySQL is already added to NetBeans. Otherwise, right click on "Drivers" and click 'New Driver'. Then show the location of the New Driver.
Right Click on MySQL and Click "Connect Using". Then you should get the following dialog.

2. This dialog requests the relevant configuration details of the Database server.
You can observe a TextBox displaying the "Database URL". This is the connection String used to connect to the database.
There are three main fields which you must supply
a) <Host> : This refers to the IP address of the computer where the Database server is running. If the Database Server is running on your machine, replace with localhost or 127.0.0.1
b) <Port> : Ports are used to differentiate services on the same machine. In most general cases of MySQL installations(ie: If you have not changed the default values), the port where MySQL runs is 3306. You can safely replace by 3306
c) <DB> : DB refers to the Database which you need to connect to. Since a Database Server can host multiple Databases at once, you need to specify which Database you need to connect with. In my case I have a Database named "Drupal"
Then fill in the username for the database and the password. By default, the root user has password root or none(blank).
After filling the configurations, it should look something similar as the following.

After entering the data, click on the "Advanced" tab and click on the "Get Schemas" button. If successful, you should get a message saying "Connection Established" as shown below.

3. After successful configuration, you should observe the following under services tab.

NOTE: You may not be able to view anything under tables is you do not have any tables. Also observe the icon for displaying the connection is slightly different now, showing that a connection has been made.
4. Once you have done that, you may need to try and execute some SQL commands. To do so, right click on the connection icon and select "Execute Command" as follows.

You would be taken to a new window as shown below.(The results would be visible only after execution of the command)

5. Now, type 'select * from' and click on the Execute button which is circled in red.
If you have data in your table, you should be able to view them in your bottom left corner of the screen.
Have fun guys
I have used NetBeans 6.1 with MySQL DB Server. But connecting with other versions of the IDE would be similar.
1. Open your IDE and click on the "Services" Tab as shown. If it is not shown, click on Windows->Services to display it.

You can see the Driver for MySQL is already added to NetBeans. Otherwise, right click on "Drivers" and click 'New Driver'. Then show the location of the New Driver.
Right Click on MySQL and Click "Connect Using". Then you should get the following dialog.

2. This dialog requests the relevant configuration details of the Database server.
You can observe a TextBox displaying the "Database URL". This is the connection String used to connect to the database.
There are three main fields which you must supply
a) <Host> : This refers to the IP address of the computer where the Database server is running. If the Database Server is running on your machine, replace
b) <Port> : Ports are used to differentiate services on the same machine. In most general cases of MySQL installations(ie: If you have not changed the default values), the port where MySQL runs is 3306. You can safely replace
c) <DB> : DB refers to the Database which you need to connect to. Since a Database Server can host multiple Databases at once, you need to specify which Database you need to connect with. In my case I have a Database named "Drupal"
Then fill in the username for the database and the password. By default, the root user has password root or none(blank).
After filling the configurations, it should look something similar as the following.

After entering the data, click on the "Advanced" tab and click on the "Get Schemas" button. If successful, you should get a message saying "Connection Established" as shown below.

3. After successful configuration, you should observe the following under services tab.

NOTE: You may not be able to view anything under tables is you do not have any tables. Also observe the icon for displaying the connection is slightly different now, showing that a connection has been made.
4. Once you have done that, you may need to try and execute some SQL commands. To do so, right click on the connection icon and select "Execute Command" as follows.

You would be taken to a new window as shown below.(The results would be visible only after execution of the command)

5. Now, type 'select * from
If you have data in your table, you should be able to view them in your bottom left corner of the screen.
Have fun guys

Comments
Yes, I have used NetBeans 6.5 and its improved features for development, but since a considerable amount of people still use earlier versions, I believe this would benefit for them.
Anyway, thanks for mentioning.
more templates
http://www.itsolusenz.com